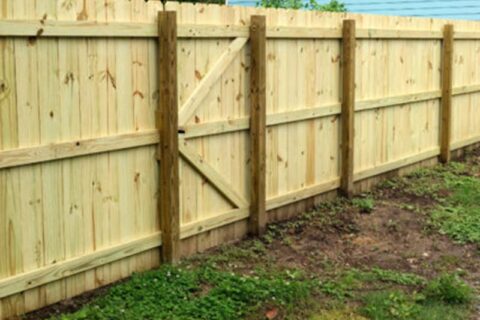
7 Helpful Tips on How to Paint a Wood Fence
There are many reasons why homeowners choose to install a beautiful wooden fence to surround their backyards.
Not only does it give the most privacy of any fencing option, but it can set a tone for your entire backyard. If you choose the color of your wooden fence properly, it can be a perfect pairing to the color(s) of your home.
However, painting a wooden fence requires a certain technique and should be handled with care.
Here are seven tips for how to paint a wood fence so that you can have a finish that all of your neighbors will admire.
1. Prepare the Fence
Painting your wooden fence isn’t as simple as stroking it with a broad brush. There are precautions that need to be taken so as not to damage the wood or the quality of your paint job.
For example, not mowing your grass beforehand can lead to you missing the lower area of the wood fence.
Start by mowing your grass, then laying a thin piece of plywood underneath the fence, but on top of the grass. This can also help protect your yard from the paint dripping down onto it.
If you’re afraid the plywood will press down too much on your grass, you may also use a tarp. Just make sure the tarp is heavy enough to provide a flat surface below the fence.
Should you notice the wood on your fence is splintered, that might be a sign that you need to replace your fence.
2. Prepare Your Equipment
Simply put, the more equipment and tools that you use for painting your fence, the easier the process will be and the better results you’ll have.
To make things easier, make sure you gather up all your equipment ahead of time. This includes an extension cord, small step ladder, latex gloves (if you’d like), tarps, old clothes to wear, painters tape, and (obviously) paint.
You might also want to have sandpaper on hand for those areas that you feel could use some filing down before you apply the new coat.
You may consider having some other tools available so you can do some basic maintenance on the fence while you’re inspecting it.
3. Make Repairs Before Painting
Things such as rusty nails or ditches under the fence should be tended to before you paint.
After all, what good is a new coat of paint if the integrity of the fence is compromised.
Go around and check for any loose screws. If you find some, use a hammer to pry them out and replace them. Also, look for broken wood or entire boards that need to be replaced.
While this may cause a setback as far as time is concerned, it’s necessary to make sure your new paint job isn’t in vain.
4. Consider Your Climate
The frequency for how often you should repaint your fence is entirely relative to the climate you live in.
The primary purpose of painting or staining your wooden fence is to prevent moisture from seeping in. So if you live in a region where it rains often, you’ll want to repaint it every 2 years at maximum.
If you’re not sure how long it’s been since you last repainted the fence or you can’t remember, then you can perform a simple test.
Throw a bit of water on the wood fence and see if the water beads up as it would on a water-resistant jacket. If it seeps into the wood, you need to schedule a repainting right away.
Not confident in your fence-caring abilities? Be sure to reach out to a trusted wood fencing expert for assistance.
5. Use a Wooden Fence Cleaner
After you’ve sanded down the rough spots of your wooden fence and made any other alterations, you’ll want to wash it down with a cleaner.
However, make sure that the cleaner you purchase is intended for use on a wooden fence.
Follow the manufacturer’s instructions on how to properly weaken the cleaning solution with water to a “T”. Then go around and hose down the areas that you notice are covered with debris or dirty patches.
6. Research Spraying Technique
The invention of a paint sprayer has made it easier than ever to repaint your beloved fence. However, as Spider-Man’s uncle once said, “with great power, comes great responsibility”.
Be sure to do some research on proper spraying technique that’s specific to the model you’re using.
Also, make sure that you’re applying the number of coats that the sprayer’s manufacturer recommends to achieve the perfect finish.
7. Consider the Paint or Stain You’re Using
The decision of which paint or stain to use on your wood fence is an important one and shouldn’t be taken lightly.
There are certain paints that do a better job of soaking into the wood, making it harder to wear off over time. Be sure to do a bit of research on the most trusted brands.
Also, make sure you purchase the correct amount of paint that you’ll need. There’s no worse feeling than having to go back to the store mid-way through painting your fence.
How to Paint a Wood Fence: Contact an Expert
If you feel like these tips on how to paint a wood fence were too overwhelming, you should reach out to an expert instead.
Be sure to read this article on the signs you need a professional fencing contractor for your fencing project.
For more inquiries, please start by reaching out via our contact us page and we’ll be happy to assist you further!


